Monday, December 31, 2012

Solar Panel Installation

This post is a long time coming. I should have written about this subject over a year ago. Well, better late than never, I suppose.

For the first few months after moving in toward the beginning of May of 2011, we were running off of a battery bank charged every other day by a generator. It worked, but gas sure was expensive. I reckon our gasoline bill just for electricity ran about $150-$200 per month. I ordered and received two 230W solar panels shortly after arriving here, but due to time constraints, it took a while to get them hooked up.

There are not many cleared spots on our property. The area around the house is relatively clear, but there are tall cedar and fir trees very near the house casting shadows on some part of the cleared area at various times throughout the day. The other cleared area is the septic field, but that area is about 250 feet from the house, and running DC wiring that long for a mere 460 (peak rated) watts of power presents a few challenges. Direct current tends to lose voltage over long wiring runs. That can be mitigated somewhat by using larger wiring, but large wiring for that distance gets expensive, almost more than the solar modules in this small setup.

Since we didn't plan to live in our off-grid cabin through the winter just yet (although those plans changed later), I opted for a temporary setup close to the house, and we would just put up with the occasional shadows in the summer time. To keep costs down, I built a simple deck to which rails that support solar modules can be attached. The rails allow the modules to be set at different tilt angles throughout the year as the elevation of the sun changes. With a little help I hand-dug an approximately 18-inch deep trench from the house to the platform about 80 feet away. 2AWG wire was laid from the house to the platform inside schedule 40 non-metallic conduit layed in the trench. A combiner box attached to the platform connects the solar module wiring to the underground wiring through circuit breakers and a lightning arrestor. At the other end, inside the house, the underground wiring attaches to a Morningstar 60 amp MPPT charge controller. This charge controller is overkill for now since we only generate less than 9 amps at about 60 volts, but when we get more modules later, we won't have to upgrade the charge controller. I got this charge controller because it was reasonably priced, could convert high-voltage DC coming from the solar module strings to the 12-volt system already installed in the house as well as 24-volt or 48-volt systems which we might use in the future, and it has an ethernet interface for monitoring over the Internet. Since we planned to be away during the winter, I liked the idea of being able to keep an eye on the battery bank and energy production.

Now that we do live here during the winter, we realize that we are going to have to clear some trees to get some sun with the low sun angle in the wintertime. Also, the panels need to be raised at least six feet off the ground so I don't have to clear away the snow that slides down them all the time.

So how well does this system work, and how much did it cost?
May through August, when the sun is not blocked by trees, it works great. The only time we run the generator is to pump water out of the well into our holding tank and to equalize batteries (a subject for another day), or run a blender or vacuum cleaner, which adds up to may an average of 30 minutes per week. Outside of those months, solar electricity production drops significantly and we run the generator about 2 hours a day to keep the batteries, which are not in good shape, topped off. We run any heavy loads during the second half of the charge cycle so as not to overburden our 3KW generator.
During the winter, the solar panels produce nicely if the snow is kept
clear and the sun actually reaches them. More often than not, though,
it's cloudy in the winter.
Between the charge controller, combiner box, and solar panels, I spent about $1500. The solar panels cost a reasonable $2.25 per watt at the time (retail) though they can be bought for half that or less just one year later. I look forward to expanding the solar array as soon as I can create a permanent place to put them. Wiring and conduit cost about $300 more, plus maybe almost $100 more for blocks, pressure treated lumber, screws, etc. You're probably thinking $2000 is a lot less money than you've read about others spending on a solar setup. Remember, I did not have to purchase batteries or inverter since those were already here when we moved in and those are significant cost items. We do need to replace the batteries soon, though, and we'd like to replace the modified wave inverter with a pure sine wave inverter which will let us run our vacuum cleaner and Vitamix blender without firing up the generator. (Some motors and dimmer switches have problems with modified sine wave inverters.) If I would have knowm how much gas we would have saved those first few months I would have increased the priority for this project.

Tuesday, August 14, 2012

Garden Update for August 2012

Our garden this year is four times as big as it was last year.  I'm actually impressed at the results considering very little has been done in the way of preparation and ammending. The three new beds this year have received no treatment other than tilling (by hand), the addition of some bagged compost (to loosen up the clay), and very little organic fertilizer.

Last year I planted only four foods: tomatoes, cabbage, kale, and one pepper plant. This year, I skipped the pepper and added some others to see how well they will grow here. I chose mostly heirloom organic seeds that can be planted "as soon as the soil can be worked." Our last frost can be as late as mid June around here, and many plants don't mature before the first frost in September. I chose seeds with the shortest "days to maturity" label that I could find, hoping that these varieties taste good, too. We haven't harvested much yet, but should be pretty soon, so taste commentaries will come later.

So what did I plant this year?
  • Three varieties of tomatoes, two heirloom and one hybrid that I bought as relatively large plants at a local nursery.
  • Kale
  • Cabbage
  • Swiss Chard
  • Walla Walla Sweet Onions (hybrid bulbs)
  • Beets
  • Carrotts
  • Two varieties of potatoes (this is Idaho, after all)
  • Watermelon
  • Sunflowers

Unless otherwise noted, I planted from seed. The potatoes and watermelon and sunflowers went in extremely late (late July) while most of everything else was planted in Late April and early May.

Two varieties of potatoes with one water melon
plant at the bottom left of the picture.

Three varieties of tomatoes surrounded by
two varieties of sunflowers.


Walla walla sweet onions, beets and carrots.
We have a lot of rabbits, so this bed is fully
enlosed--top and bottom.
Chard (mostly eaten by the deer), cabbage and
kale, one of our favorite greens.

After last year's experience, I knew that a fence was mandatory if we wanted to eat our food and not feed the deer. Nonetheless, the deer got to the chard before I could get the fence up, so we won't have much chard to eat this year. The location of the garden is still tentative, and even if it is to become permanent, I would want to clear some small trees and expand it, so wanted to spend as little as possible on the fence while keeping it effective. I found some cedar poles that a previous owner had cut and left lying behind the barn that were about 12 feet long (maybe longer). I figured that should be high enough to keep the deer out. I opted for six-foot welded wire fencing mainly because it was cheapest and could be most easily moved. The cedar posts wrapped were put at the corners and 8-foot T-posts were used where needed along the edges. It's not a very sturdy fence, but it seems to be doing the job with the deer as they seem to be avoiding it. I doubt it would stand up against a moose, though, and I saw one just yesterday, but it got scared and ran off when it heard us watching it.


Our temporary garden fence. The final fence will probably be chicken wire on the bottom to keep out small animals topped by electrified wire to keep out the big ones. Welded wire fencing doesn't work so well on such hilly terrain. The orange tape
is to help the deer see that there is a new obstacle in their way.

There are also some wild raspberries and plenty of thimbleberries growing on our property. I'm told thimbleberries are best eaten as jam, and I'll say I'm not very fond of them fresh off the plant. My daughter seems to like them though. When I take her picking with me, they all go straight to her mouth and none make it back home in my bucket. I estimate I've been able to pick about a cup of raspberries over the last few days, and they taste much better this year than they did last year when i sampled some. Yeay!

Our blueberry bushes are growing nicely. I plucked the flowers off the bushes this year to encourage them to fill out. I did save just a few flowers, though, and one berry has made it to maturity without falling off early. We split it three ways, and it was delicious! I'm really looking forward to next year, when we should at least get a handful or two of blueberries.

Monday, April 16, 2012

Garden Update for April 2012

Spring has finally sprung in Northern Idaho. While downtown has been clear of snow for a few weeks now, the snow in our neck of the woods has just recently begun to melt. It took temperatures in the 50s and 60s recently to get it going. And go it did. The quick snow melt almost washed away our driveway and the road. A few days of digging ditches in the mud and flowing water saved both.

The growing season is short here--our last frost is usually in early June. And summer nights are pretty cool. It may be in the 80s during the day, but nights can still be in the 40s. Many plants don't like this large temperature swing, so you have to take measures to keep them growing.

Last year, we had problems with deer eating our food. So this year I plan to put in a seven foot fence. I'm hoping it will also deter the moose, but as big as they are, it would take a pretty strong fence to keep them back if they really want something.

I plan on planting some root vegetables this year, including carrots and beets. We have plenty of rabbits around here, so I wanted to make sure they didn't eat my carrots. While attending some meetings organized by our local gardener's association, I learned that a lot of people have problems with gophers and such, too. The solution, I'm told, is to create a fully enclosed garden, including the bottom.

So my first project this season was to build a permanent garden bed that will prevent any digging or burrowing animal from getting in. Aside from the wire fencing, all materials were scrap that was lying around waiting to be used. The wood frame was made using the crating for the roof installed last year and left over from the solar panel installation. To "seal" the bed, the fencing is stapled to the wood along seams, and the bottom is stitched shut with wire used to hold the fencing in a roll. The finished size is ten feet by four feet.

The enclosed bed before it is filled with dirt.
From the ground to the top is about two feet.


This bed is about two feet deep. The location is slightly inclined so I leveled the bed by leaving more exposed above ground at the bottom of the hill from where these pictures were taken. I basically just dug until I hit the orange clay and then dug a little more, moving some dirt from the top of the hill to the bottom so that the bed would have roughly the same usable depth all the way across. We'll have to wait and see how well this actually holds up.

The finished bed backfilled with dirt. The sides will probably have to
be reinforced before it is filled to the top.
I'll try and get some organic compost this week to mix in with our soil. The soil around here has quite a bit of clay, although being in the forest there is a bit of organic matter on top. This particular spot is disturbed soil and the hill was probably created when the area for the house was cleared. I'll probably make two more beds in this hill, but probably not fully enclosed like this one. This box will be solely for plants needing protection from diggers.

Hopefully by next week we can start planting.

Tuesday, March 13, 2012

Faster Internet - Is It Possible?

When we came back from our Christmas 2011 vacation, I discovered that Verizon's 4G LTE service had come to town. In town, I measured the connection speeds at 20Mbps down and 7Mbps up. That was really good news! The real question, though, was whether or not I could receive a 4G signal at the house. When I got home, I checked several locations around the house and was unable to receive a signal anywhere. It turns out, if I wait long enough, I can get a 4G connection at our bedroom window.  It was weak and would disconnect and reconnect all the time, but it was there. On a warm (above freezing) day, I stuck the modem outside the window and noticed a tripling of connection speeds. This got me thinking.

How could I bring this stronger outside signal indoors to my router? My 3G cellular repeater works great, but doesn't repeat 4G signals which are on a different frequency. A quick search of the web told me there weren't any 4G repeaters on the market--yet. What about an external antenna? At first, I didn't see any external antenna ports, but upon further inspection, I saw that they were covered with little black stickers. So I ordered a full-band outdoor antenna that works with Verizon's 4G frequencies along with some cabling and an antenna adapter for my modem.

For the last week or so, I've been trying to get this to work. If I put the outdoor antenna in the same spot outside the window where my modem worked, the modem will not connect. Strangely, the RSSI (received signal strength indicator) indicates a slightly stronger signal, but just will not connect. When the snow finally stopped falling and it was safe to go out on the roof, I tried raising the antenna about six feet above the roof. I was able to get a good RSSI along with a decent download speed, but a down right horrible upload speed of about 20Kbps. That's slower than a dial-up connection on the uplink and not suitable for the work I do. I moved the antenna to several locations around the house, and no matter what I did, I could not get a suitable upload speed.

I called the 3G Store, the vendor from whom I purchased the antenna kit, and we talked through everything I tried and they confirmed, I tried everything possible.  They suggested I try pinching the connector on the antenna adapter to create a more solid connection between the antenna and the modem. Back outside I went, trying all my tests again. At best, performance with the outdoor antenna was about equal to using the modem without an external antenna while it was placed inside the house in our upstairs bedroom window.

Based on all this experimenting, I suspect that while the antenna helps me receive a stronger signal, it doesn't help and in fact may hinder my transmit ability. Wilson electronics does make a direct connect 4G signal amplifier. I'm considering trying it, as if it can increase my uplink speed, I will get a significant performance increase. For me, this means two people in the house can each use the Internet without interfering with the other's work.

So until I consult with the 3G Store again and decide whether or not the amplifier will help me, I'm going to try leaving my modem in the upstairs bedroom window and seeing how it works out for me. Just for comparison's sake, here are some Internet speed test results from speedtest.net showing my 4G connection speeds (when it is actually working).

4G speed test results from indoor window location.

Monday, February 27, 2012

Winter Chores

Throughout the summer, I thought that winters here would require less work since there is so much less daylight and we'd be stuck inside. Well it turns out there is still quite a bit to do even if it is dark outside.

Whenever it snows more than a couple inches, which is more often than I expected, I have to run the snow blower down the driveway and to all the locations I walk regularly--the generator shed, the solar panels, the wood pile, etc. I have the routine down to under an hour if it isn't a blizzard, but when we get a foot of snow all at once it can take twice as long or more, depending on how wet the snow is. I always try to clear as much snow as possible before it rains, because the watered down snow will inevitably freeze in fairly short order making walking up and down our driveway quite treacherous and delaying the day that we can actually drive up it. Since I work during the day, and because the snow blower has a light on it, I usually end up doing this chore at night if it's a work day.

Maintaining clear walkways makes daily chores much easier, especially
when the snow gets deep like it is now. These solar panels were installed
with summer use only in mind. They will probably get raised or even
moved to a less shaded (in winter) location this summer.

I chop wood about every other day. I do it manually, because I didn't want to spend money on a wood splitter this year after all the money we've spent on home improvements, and because I really wanted to make sure I can split wood without power tools if I have to. I've discovered that it only takes a few minutes a day to split wood once you get the hang of it. I spend 15 to 30 minutes to produce about a two day's supply of firewood. Our wood pile contains mostly pine, fir, larch, and birch. The birch is the hardest to split, but even birch rarely takes more than a few good whacks before it splits. I've actually come to enjoy the chore of splitting wood!

I use a six pound maul with a fiberglass handle. A friend back east who has chopped more wood than I had at the beginning of the year told me what to get. He told me an eight pound maul can be more than light skinny guys like us can comfortably control. I'd have to say I agree with him. The six pounder that I have feels like a good match for me.  After the incident last November, I try to split the wood so that logs are no longer than six inches wide. To ease stress on my back, I use a large diameter short log to lift the piece I'm splitting about a foot off of the ground. Next year, I might try putting this setup inside a tire, so that when the log splits, the parts don't fall into the snow. If that turns out to not be very safe, I'll abandon the idea. Feel free to comment on this idea or if you have a better idea for solving this problem.

And of course, there is the never-ending chore of feeding the wood stove. It's necessary to stay warm, and we've gotten used to it. But there are times when we are just so involved with what we are doing that neither of us wants to. We do it anyway because we have to. Such is life.

The one winter chore I really don't enjoy is changing the oil in the generator. The old generator just wasn't designed for maintenance. The Honda generator looks much easier and cleaner, so maybe I can finish changing the oil before my fingers freeze. Time will tell, I guess.

Generator Troubles

When we came back home after being away for about a month for the Christmas and New Year holidays, our generator was giving us troubles. It refused to start. Eventually, the starter cord broke and I had to give up for the time being. I went to the local Honda dealer because the local small engine repair shop was closed. While there I checked out their line of generators and as it turned out they were able to repair the spring and cord for my broken generator while I waited. How nice! I replaced the spark plug and the generator started right up, although occasionally, it would stop every once in a while for no apparent reason.

Well, here it is a little over a month after that incident, and now the generator doesn't run for longer than about a half hour at best. That's enough time to pump some water out of the well, but not long enough to do a load of laundry, and certainly not long enough to charge our batteries. During our cloudy winters, I usually need to run the generator about two to three hours per day to charge the batteries. It's time to get the generator repaired, but due to all the snow we've had I can't get the generator from the generator shed to my SUV parked at the bottom of the driveway. My neighbors tell me they have backup generators for just these occasions since they have been in the same situation as me before. In fact, their primary generator was in the shop. It was time to pay another visit to the Honda dealer.

Honda generators have a reputation for reliability. Also, Honda has a nice line of super quiet generators which are also very fuel efficient and don't require ethanol-free gasoline.  Each of these features appeal to me. I just wish Honda generators didn't cost so much.

We rarely use anywhere near the full capacity of the 8KW Generac generator that came with the house. I wanted an efficient generator that could charge our batteries or run an 1800 watt appliance, or charge our batteries and run a smaller appliance at the same time.  I ended up buying the largest Honda super-quiet inverter-based generator they offered--the EU3000is. The weight, at 134 lbs plus about 25 lbs of fuel and oil, was just manageable by my wife and me on our steep icy driveway. It took two days to get it hooked up because the NEMA L5-30 receptacle did not mate with any NEMA L5 plugs I could find at Home Depot. So after another trip back to the Honda dealer to get the special L5-30 plug, I was able to fabricate my cable and wire the generator to the house.

I fired it up and admired the fact that I could actually talk to my wife on a 2-way radio even as I stood over the generator. I was impressed when I came inside and inspected the charger and noticed that it was charging at a full 100 Amps (at 12 volts). I had never been able to achieve that with the old generator; at best I got 80 amps and more typically 40 to 60. I can now charge batteries in about half the time and burn less than half the gasoline at a lower cost because it doesn't have to be premium ethanol-free gasoline. I used to go through five gallons in two to three days. I now get three days on 3.4 gallons. That's really nice! And there is a wireless remote start kit that I will probably install later. That would come in handy if I need to start the generator at night and don't feel like getting all dressed up to go hiking through the snow just to get a small burst of power.

The new 3KW 120V Honda generator with the
broken 8KW 240V Generac generator behind it in
our generator shed about 120 feet from the house.

When the snow melts and I can get my SUV up to the house, I do plan on repairing the old generator. After all, it is capable of providing over twice the power, even if it isn't super-quiet or fuel efficient. And it's always good to have a backup, although, I think the backup will be the bigger, noisier generator from now on.


Resources:
Honda Generators: http://powerequipment.honda.com/generators

Wednesday, November 16, 2011

Close Call

We are expecting our first winter storm later today. Accumulation up to ten inches is forecast for elevations above 2500 feet. We are right around 2500 feet so we may get rain or snow. But our road is already getting slick from the frost and snow flurries that come on most nights. So I had a lot to do today:
  • Finish stacking and cover the two cords of wood that were delivered yesterday
  • Stock up on gasoline for the generator and snow blower
  • Get the brakes fixed beacause the brake light recently came on on the dashboard and hasn't extinguished.
  • Get tire chains. Did I mention that the road has gotten pretty slick?
I got up early, so I could get a head start before going to work. I began by starting a fire in the woodstove so the house would be warm when the family woke up. Fortunately for me, my wife and child woke up earlier than I had planned. I had put a large log on the fire so I wouldn't have to tend the fire while stacking wood outside.

This normally works for me. But this time, the fire quickly became intense. The log started burning almost before it got through the door of the stove. Since the heat was quickly building I shoved it in and shut the door. The flue temperature kept rising. 400°, 450°, 500°. Usually it stops around there. 550°, 600°, I closed the draft all the way down. The temperature stopped rising for a few seconds, but then it started climbing again. I let my wife know I might need some help in a minute because the stove was hotter than I've ever seen it. 650°, 700°. I opened the door and closed it again to see what would happen. Fire came out the door and the smoke detector went off in the bedroom upstairs. I wondered if there was some sort of petroleum-based fuel in this log. I briefly considered using a chimney fire suppressant stick. But since I hadn't actually used one before and the fire was still more or less under control I decided lets just remove the log. It was a big log and not easily manageable using our fireplace tools. It's a good thing I had a shovel on the porch recently used to remove some ice. I grabbed it and together we carried the flaming log across the living room and threw it into a pile of snow and ice after briefly dropping it on the porch. The stove thermometer was now reading 800°--the highest temperature on the scale.

Our stove thermometer. Without this, we might have not known anything
was awry until it was too late.


The blaze has been extinguished


Whew! The house was full of smoke, but fortunately not itself smoking! But what happened? Would the temperature have come back down if I would have just waited longer, or would the chimney have caught fire? Would the stove have cracked from the heat? Who knows. One thing I learned is to not use logs that are too large to manage with your tools, even if it means feeding this stove more frequently. Also, don't burn logs with a lot of sap or pitch. One person I spoke with today suggested that might have been the cause of my problem as it's not common to experience what I did from an ordinary log.

This story may not seem so dramatic, but let me tell you, it sure got my adrenaline pumping. We don't have a fire hydrant outside to hook up to and put out the forest fire that would start if this situation would have gone out of control. By the time a tanker truck could get up the mountain, it would be a pretty big problem to deal with.

Our stove came with the house and had a few problems which were fixed before we started using it. Now it has another one, not the result of this episode. The draft control handle has separated from the draft control, so to control the draft, one must internally capture the draft control with the rod extending from the handle. This method works but is a bit of a hassle. If it were summer, I'd try to take the stove apart and fix it. But it gets cold in here pretty quickly when the temp outside is barely above freezing during the day.

We are thinking of replacing the stove. We could also replace the stone work around it which was an amateur job and looks it. The stone is nice, but the finish is awful, it doesn't extend far enough from the stove and we don't have additional matching stone. So while out getting ready for the storm, I visited a stove store in town. We have heard good things about Blaze King stoves. The dealer told me they are the Cadillac of stoves. They will burn for up to 15 hours which sure beats the three or so we get now. They also burn much less wood than our current stove. It's too bad they cost as much as they do. I'm almost convinced it's worth it, though. We are trying to figure out how to fit it into our budget after all the other home improvements we've paid for this year. We bought seven cords of wood to make it through this winter which we weren't intending to stay for. If we were to buy just five cords instead of seven every year, then this stove would pay for itself in seven years--less if we have to replace our stove anyway. Something to ponder. The other stove the dealer recommended was a Lopi stove. It can burn up to ten hours, but more typically about six hours. That's better than what we have now, but it's not all night.

Resources:
Blaze King stoves: http://www.blazeking.com/
Lopi stoves: http://www.lopistoves.com/
Chimfex fire suppressant: http://www.chimfex.com/

Thursday, October 20, 2011

Garden Update for October 2011

Well, we have finally had our first frost. To save the tomatoes, I picked them green. We, and by we I mean primarily our darling toddler, have enjoyed the grape tomatoes we picked every other day. And we were able to let two of our larger heirloom tomatoes ripen on the vine. The green tomatoes we put in a large paper bag from the grocery store to ripen. Those that have ripened, just havent' tasted as good as the ones tht ripened on the vine, but at least they haven't gone completely to waste.

I'm happy to say that the kale we were able to harvest before the deer finished it off was quite good. And so was the cabbage. Apparently we have the right soil for them. The tomatoes did ok, but I expected better. I recently learned that the cool nights that we have here prevent the tomato plants from getting as big as you would see further south. Next year, I'd like to try building a hoop house. That should extend future growing seasons and keep plants warmer at night.

To prepare our garden for next year, I planted a cover crop of winter rye. I hear it's supposed to help add nutrients to the soil. I've never done this before, so we'll see next year how much it helps. I would love to be composting, but since we don't want to attract certain wildlife, we haven't been doing that. I hope to come up with a solution by next summer. If anyone has some experience composting without attracting nosey animals like bears, please let me know what works for you.

I've also taken a few classes offered by the gardener's association in our county. I've learned about growing berries and keeping an orchard. I look forward to planting rasberries and blueberries. Both grow well here and it turns out that now that I know what a rasberry plant looks like, I see wild rasberries all over our property. They just aren't producing many (if any) berries. I also want to plant some fruit trees next year. I'm thinking of two apple trees of different varieties, an apricot tree, a plum tree, two cherry trees, and maybe a hazelnut tree. To pull this off, I'll probably have to cut down a few trees so they can get their "full sun." Since our well doesn't produce quickly enough to irrigate, I would like to site the orchard so that it is near one of the seasonal springs on our property. That pretty much narrows it down to one site, relatively near the house. I hope the soil is workable in that area. We'll find out next spring. Stay tuned.

Monday, September 26, 2011

Garden Update for September 2011

The wildlife is still making their presence known. Last Friday morning we were awakened at about four o'clock in the morning by what sounded like a bunch of loud yapping dogs. We happen to know there is a pack of five wolves on our mountain so we knew what the sound was. I got up to look around the house to see if I could actually see them--they sounded so close. But after opening a window, I realized I was hearing echos off the nearby ridge. They were probably much less than a mile away, though.

Recently, we had our first near frost. Yes, in September. The forecast overnight temperature was 33°F. We hurriedly threw a cover over the tomatoes and hoped for the best. I picked the one heirloom tomato that was turning yellow so we could at least taste one should the rest freeze. A few days later, the tomato was a nice orange with red stripes--the way it's supposed to look when ready to eat. That was the fleshiest tomato I've ever had--delicious! We were going to try to save it's seeds, but we could only find three! We figured we'd wait until some of the other tomatoes ripened since this one was not the best of the bunch.

I was really annoyed when I checked on our garden this morning. There are usually four or five grape tomatoes ripe enough to pick on any given day. My one year old daughter has eaten about 95% of the tomatoes I've picked this year. Then I noticed something strange. Half of the heirloom tomatoes, including the ripest one that I've been waiting to pick was missing! Then I noticed that the cherry tomato plants had been knocked down to the ground. I went and told my wife the deer had eaten our tomatoes. When I came back out, I realized they had also eaten all of our kale! All of it! I'm glad I got at least one cutting of kale earlier in the month or I would be even more upset. As it is, I have half I mind to go find the deer that ate my kale and eat it!

I can no longer recommend the deer netting that comes with a 100% money-back gaurantee. I don't want more netting--I want my kale! It looks like we'll have to build a fence for next year. We have extremely rocky soil (with very large rocks), so I'm not looking forward to digging holes for the fence posts. But I'm determined to keep the deer out next year. Oh, and keep the bears out of the compost pile, too. And just for good measure, it must keep the moose out, too. A future post will have all the details on our garden fence. Look for it next year.

Our garden after the deer attack: Kale completely gone, and
several heirloom tomatoes eaten. Some sweet 100 tomato
plants were knocked over, too.

Tuesday, August 16, 2011

Exploring

Every now and then, I like to look around the property and see if I find anything interesting. Usually I find another car part, or a fresh pile of moose dung or such. There is a tree next to the drive that looks like it has been laying there for a few years. I thought it might be good for firewood. As I was looking for a way to support it while I cut it, I noticed something I hadn't seen before.

The entrance to a hidden room that I found on our property

Could this be what I think it is? Or is it something totally different? One of the things I would like to do when I get the chance is to build a root cellar. One of the few places I could do this relatively easily is in the side of the hill created when the earth was moved to put in the driveway. So in this general vicinity is where I would have tried to put in a root cellar. Maybe the hard work was already done for me! Or better yet, maybe it's a secret vault filled with treasure. I knew the chances were slim, but wouldn't that be nice?

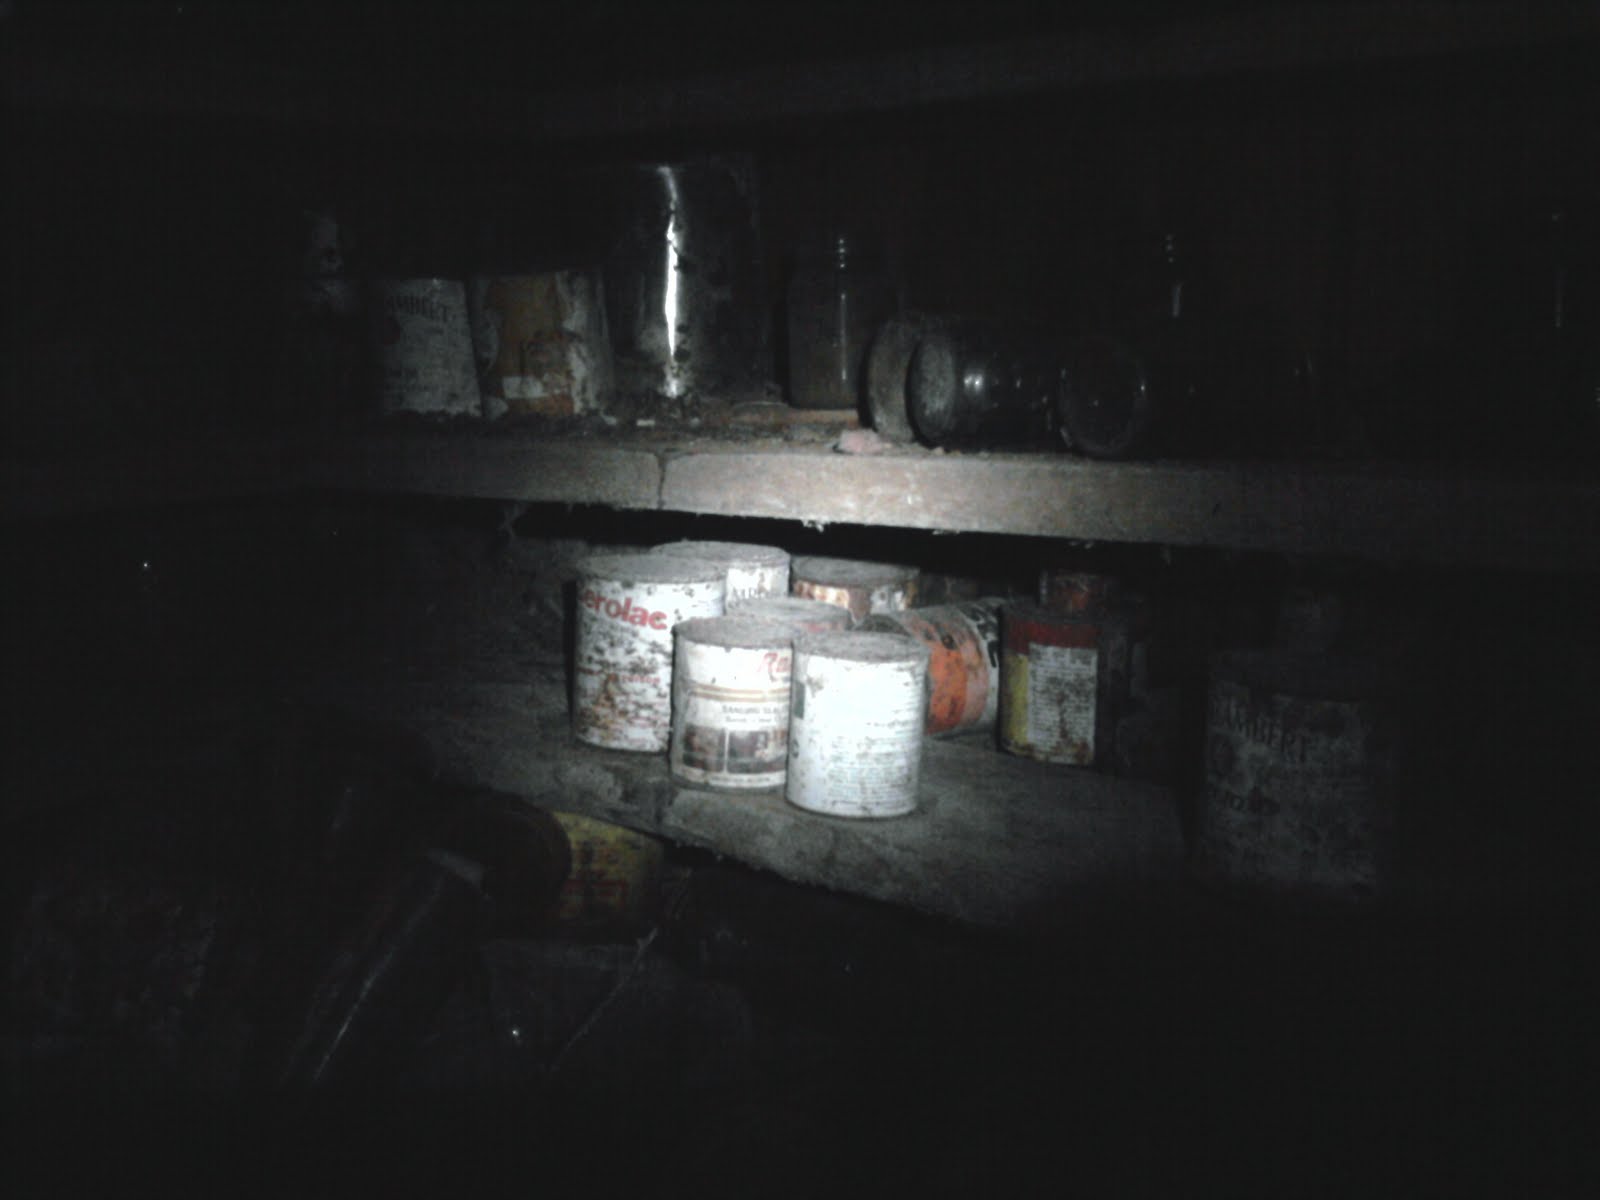
Upon taking a peek inside, I saw some glass jars and jumped to the conclusion that my first impression was correct: this is probably a root cellar. After sticking my helmeted head inside and taking a look around, I found reason for disappointment. There were more paint cans than there were food jars. Perhaps this is a toxic waste dump of some sort. (It's probably not that bad.) Furthermore, the roof had collapsed. I figure that it probably collapsed when the tree I was about to cut up fell on it.

This is not exactly what I was hoping to find

In the near future, I plan to investigate further whether this cellar can be safely repaired and used. If the roof hadn't collapsed, it would be about three to four feet above the floor. The room was probably about six feet or so by about four feet or so. It's certainly not a large area, but it is a start. I can't wait to see what the possibilities are.

We have an unfinished pole barn on our property. A robin has been trying to build a nest at various inappropriate places on our house, and after being harassed by us, finally built a nest in the barn. As I was retrieving something from the barn, I heard a whole lot of tweeting going on. I looked up to see three mouths expecting food.
Some robins nesting in our barn
I can't imagine ever having this kind of fun in the city. With every new day at our country home, I am enjoying it more and more.


Sunday, August 14, 2011

Garden Update for August 2011

Our garden is coming along nicely. Over the last few weeks, we've tilled another area (by hand) in preparation for next year. Since it is slightly inclined, I'm thinking about leveling it a bit. But I've seen plenty of fields that aren't perfectly flat, so I'll try planting it the way it is and see how it works out. I tried planting some quickly maturing tomato and eggplant seeds that are a few years old in the new garden area, as well as some pickling cucumber plants I picked up at a local farmers market. Unfortunately, a deer came, removed the netting, which was held down by rocks, and ate an entire cucumber plant the next night. So I went and got some tent stakes and haven't had any more problems...yet.

I'm impressed with the kale plants. The plants that were eaten by an animal a while back have regrown and are almost ready for harvesting again. We should have plenty of kale in another month or so. Our cabbage is just about ready to harvest, too. The temperature is consistently in the 80s during the day now and in the low 50s at night. I've recently learned that cabbage plants like a steady soil temperature. I should have used mulch to help with that. When the temperature fluctuates so much, the cabbage growth bursts and the heads will split. Mine haven't split too much, but I see that some of the leaves have cracked. I'll keep that in mind for next year. The way the grass grows around here, it shouldn't be hard to make mulch, once we get a gas powered lawn mower instead of the reel mower we've been using.

Cabbage is almost ready and notice how pretty the kale is.
The largest kale plants are the ones that were completely
eaten before.
And finally our cherry tomatoes are producing nicely. I'm sure once we amend the soil properly we'll get an even higher yield. One or two of them have a tinge of yellow on them, so I'm getting excited! Super Sweet 100 is probably my favorite variety of grape tomato so far as taste goes. I'm very happy with what we're seeing for having put so little work into it. We've weeded three times now.


Super Sweet 100. My mouth waters just
thinking about them.


What in Tarnation?

About two weeks ago, my wife noticed a plant on our property that looked, well, suspicious. If it were just the one, that would be easy, dig it up, throw it away, and nobody would know any better. But maybe there were others. We started looking around our yard and found there were probably hundreds of these plants. We started to get worried. How do we discreetly rid ourselves of hundreds of these plants. And can we possibly find and destroy all of them? Burning might not be such a good idea. This is the plant I'm talking about:

I hope this plant isn't what it looks like
After a not so restful night we decided to study this plant further. Maybe it wasn't what we thought it was. Maybe it was a look-alike. Then we found several flowering plants. This should help us to positively identify the plant. The flower looked like this:


It turns out that it is illgal to not remove this plant if it is on your property in certain counties in Montana. Fortunately, we don't live in Montana, as getting this many plants under control quickly would be a real chore. I checked our state's list of weeds that homesteaders are required to control, and this plant was not on the list. However, it is an invasive and noxious weed brought to the northwestern United States from Europe about a century ago that is quite prevalent in the area. It is spread by seed which can number over 1000 per plant, which can be transported throughout the region in hay. The plant is called sulphur cinquefoil. It is a type of rose and has a woody root that should be removed along with the plant to prevent it from growing back.

We are so relieved that this plant isn't what we though it was. This stuff is growing along side the road going through our property, not just by the house. This situation also got us thinking about what we would do if we were to find an illegal plant, or worse, a whole field or forest full of them. I guess self-reporting might bring a lighter penalty than if your neighbor makes a report to the police. But if the police started visiting all the neighbors on our account, it might not make a good impression, considering we haven't met all of them yet. Becoming more independent is making me learn a lot more and think a lot more than I used to.

Thursday, July 21, 2011

Garden Update #2 for July 2011

Well, it finally happened. Our kale was eaten while we were gone for the weekend. And what was left was eaten again a few days later. I suspect it was the rabbits that we see almost every day, as I didn't see any new hoofprints in the garden. I'm disappointed, but it's my own fault really, I should have covered it with netting. So I've planted some more. It only takes 60 days to mature and is cold hardy should winter come very early this year. I happen to like kale a lot, so I planted almost four times as much as I had before.

What's left of my first planting of kale.
Another two weeks or so and it would
have been ready to harvest.

There is a lovely wilted kale salad that we like to make, so there is no need to worry that there will be too much. There is also some green fruit on our cherry tomato plants, which will go quite nicely in our wilted kale salad.

While I was working in the garden, I spotted fruit on the wild strawberry plants that cover a large part of our yard like grass. I tasted some, and they are quite tart--not at all desirable for eating. But they smell very nice and might make a nice fragrance for some homemade soap. We haven't made any soap yet, but would like to some day when the renovation slows down. I've been told that if I want to grow strawberries to eat, I need to get rid of all these wild plants because they will cross with my good ones and ruin my crop. Hmmm... more work to do. These wild plants are everywhere here.

Wild strawberries from the yard. These berries are very
small. That dish is the size of a small cupcake.

Resources
James Russell's Wilted Kale Salad recipe: http://therawchef.blogs.com/russell_james/2006/11/wilted_kale_sal.html

Monday, July 11, 2011

Our Water System

Many people, especially city folk who aren't used to living with a well, are intrigued by our water system. This post is to help them understand what I'm talking about when I mention our water tank.

This system was put in place before we bought the house, and it works reasonably well, allthough I would like to make a few changes to increase reliability and availability.

We have a relatively shallow well--only 75 feet deep with the static level at about 20 ft. However, the well, on average, produces only about 4 gallons per minute (as observed during a flow test during a winter home inspection). That's an average of 4 gallons per minute, that is not a continuous flow. In reality, we can pump about 150 gallons out of the well at a much faster rate before it slows to almost nothing, then resumes again for a minute or two a few minutes later. If pumped continuously, the flow will start and stop every few minutes. This is not ideal for on-demand water use in the home. Furthermore, the well pump requires 120V AC and draws quite a bit of current, making it not feasible to run the well pump off of the house battery bank.

To solve this problem, a previous owner installed a 350 gallon storage tank inside the house. The tank is filled via underground pipes while the well pump is powered by the generator. I actually plug a cord into an outlet on the generator to fill the storage tank. This takes about 20 minutes and I only need to do it about every two or three days, and only sometimes more frequently.

Our indoor water storage tank, next to our efficient washing machine.

To provide pressure in the house, a 12V DC pump pressurizes a small tank to 80PSI. When the pressure in that tank gets down to about 40PSI, the pump pressurizes the tank again to 80PSI. The pressure pump runs off of the house battery bank and provides adequate pressure for household water use at conventional water taps through out the house, including shower, toilets, sinks, washing machine, and outdoor spicket. Hot water is provided with a propane-burning instant (tankless) hot water heater which uses electricity only to light the propane and to power the thermostat. So far it has worked well.

Pressure pump and tank

I would like to make some improvements. The underground pipes are not deep enough to prevent freezing in the winter. This may be because there is a lot of granite in the ground in the vicinity of the house. But it's also because the water pipes enter the well above ground where there is definitely the potential for freezing. I'd like to have these pipes enter the well casing under ground. I'd then like to put a hand pump on top so that we can still get water if something should happen to the well pump.

The insulation on these pipes is no match for the cold
winters here. They need to be underground.

I'd like to replace the 120VAC well pump with a DC pump that can run on power produced by solar panels. That way when the generator breaks down again, we can still get water out of the well.

And finally, I'd like to add some sort of water-level detection mechanism that can turn the well pump on when the water level in the storage tank gets to a certain level and then off again when it's full.

Garden Update for July 2011

feOur tiny garden is coming along quite nicely, except for the peppers. I think they might need more water or something as they always look a little dry by the end of the day. The cabbage looks like it will be ready by the end of the month or so, and the kale is coming in quite nicely.  The tomatoes have flowered. I really haven't put in much effort into the garden at all. Just watering every day and fertilizing once a week.

I'm really happy that I haven't had to do any serious weeding yet. I know this will make some of my gardening friends jealous, but I'm pretty sure that whoever tended this plot before me must have done a good job of getting rid of weeds. I suspect that when I expand for next year, I may have more weeding to do.

The netting seems to be working. I have seen deer hoof-prints in the garden, and I see deer around the house frequently, but so far, nothing has been eaten in the garden. Maybe we are just growing foods that deer don't like? At any rate, I'm happy the deer are not being pests this year.

Here's a picture of our cabbage and kale:

Cabbage and kale are doing great!


Thursday, July 7, 2011

Returning to the 21st Century By Installing a Washing Machine

Almost any washing machine can be used off-grid if you have a good generator. Some washers are more efficient than others, though, and if you want to run the washing machine off the solar panels, more efficient is definitely better.

There are a number of options for washing clothes off-grid, and I'll talk briefly about each of them:
  • Fully manual: This includes beating against rocks in a creek (your downstream neighbors might not appreciate this, so not recommended), washing in a tub with a scrubber, the old plunger-and-five-gallon-bucket... You get the idea.
  • Wringer washers: I hear these are pretty reliable and quite efficient with water, especially if you do multiple loads using the same water, starting with the least soiled clothes. These machines are typically obtained (well) used, but they are making a comeback and are being manufactured again. They are available with hand-powered or electric wringers.
  • Conventional late 20th century washing machines: Most were not built with energy- or water-efficiency in mind. If you want a conventional washer, get a modern one.
  • Staber washing machines: These come highly recommended by those living off-grid because they are efficient and easy to repair. However, after reading user comments on the web, it seems to me that they need more repairs (easy or inexpensive as they may be) than a washing machine should need. They also cost more than modern washing machines. If sustainability is important to you or you are so remote that it could take a long time to get a replacement part, seriously evaluate this option.
  • Modern high-efficiency washers: Today's front-loading (and even some top-loading) washing machines are very water-efficient, and many are very energy-efficient, too. These modern washing machines do cost more than the least expensive models available, but the water- and energy-saving features pay for themselves in very short order when living off-grid.
We felt that the positive aspects of a Staber washer did not justify the expense for our situation. We opted for the most energy efficient front-loading washer available at Home Depot, which turned out to be an LG WM2140CW. This machine (or previous years' models) was rated highly by users and seems to be quite reliable. Should the washing machine fail we will resort to washing at a laundromat in town or we will use the five-gallon bucket and plunger. We also purchased the extended warranty because it covers power surges, and the store sales person assured us that any mishaps caused by running off a generator would be covered.

Our experience with the washer has been very good for the month that we've had it. Electricity usage is very low and I think I may be able to run it off of our soon-to-be-installed 460 watt solar array during the peak power period. Usually, motors don't work well with modified sine wave inverters like we have, but when started accidentally once without the generator running, it seemed to work just fine. It is possible to install a capacitor to smooth out the starting surge created by many motors. I haven't done this yet, but will investigate if it is needed after I get the solar panels installed. Water usage is also quite good, using about the same or less than would be used by a 10-minute shower. Another nice feature of this washer is its high-speed spin cycle which leaves most clothes pretty dry, reducing the amount of outdoor drying time required.

Water efficiency is also an important factor. Most people don't realize this, but more than one fourth of the energy produced in the United States is used to pump water. When you are off-grid, you need to consider the energy cost of the water you use. If you have a deep well and need to run a generator to pump water out of it, then filling a top-loading agitating washer a few times per load of laundry can cost quite a bit more in fuel than would using a front-loading washer which uses one fifth as much water as a top-loading machine. If you have more water than you know what to do with coming out of the spring uphill from your house, consider yourself blessed, you have some really cheap water. But for the rest of us, the cost of water is an important consideration.

Resources
Staber washing machines: http://www.staber.com/
LG washing machines: http://www.lg.com/us/laundry/index.jsp
Lehmans has lot's of off-grid appliances. Washers here: http://www.lehmans.com/store/Home_Goods___Laundry___Washing?Args=&view_all=&sort_by=

Sunday, June 5, 2011

Becoming a Logger

I've never cut down a tree before, but since our primary source of heat is our woodstove, I need to learn how to produce fuel for it. I haven't actually bought a chainsaw yet, but I did inherit a small electric one, which if I use within 50 feet of the generator works ok for cutting up the tree into 16" to 18" sections.

Today I started by picking some trees that were in the way and needed to come down anyway and that were small enough that I couldn't cause any significant damage to anything (including myself) if something went wrong. As luck would have it, both trees were just out of reach of my 50-foot extension cord. So I used a hand saw. The standing dead tree was only about four inches in diameter and the living one was about six inches, so were easily manageable with a small handsaw. Both were birch trees about 30 feet tall or so.

After a minute or so of sawing the dead tree came down. Even with my little handsaw, I made two cuts--the first on the side I wanted the tree to fall and the second cut slightly higher from the back side. The live tree took a little longer because the moisture caused the saw blade to stick a little, and because my second cut was crooked. After the trees had fallen I dragged them over near the generator shed so I could use my electric chain saw to cut them up.

Using a chain saw didn't come naturally at first, but it wasn't hard to learn. I didn't naturally want to keep the bucking spike against the tree, but once I realized how doing that makes it so much easier to manipulate the saw and actually cut the wood, the bucking spike became my friend, and the work progressed much more quickly. I didn't get much firewood out of the dead tree because part of it was rotting. The live tree should give me almost one day's worth of heat on a not-too-cold day.

The trees are now stacked and drying out, getting ready for use next season. I've got a lot of work to do before next winter. Hmmm, I'm going to need a real saw.

Wednesday, June 1, 2011

Starting Our Garden

Memorial Day may mark the official start of summer for some, but for us it heralds the arrival of spring. Most people around here believe that the last frost has finally passed, and we sure hope so! Even for this area, it has been too cold much longer than usual. Night-time temperatures still dip into the upper 30s, though more often they are dipping only to the low- to mid-40s.

So this four-day weekend was a great time to start our garden, among many other tasks. Our garden is pretty small--only about six feet by ten feet--and took less than an hour to dig the old-fashioned way--with a garden spade. I chose this particular location mainly because it appeared to me that the area had been used for a garden before. I thought that maybe the soil had been amended before, might contain fewer weeds and such, and would be easier to dig. It was certainly easy to dig, and the soil appeared rich and dark. We'll have to wait and see about the weeds.

Our goal this year is simply to learn, so we didn't want a huge garden. It's been decades since I've worked in a garden. My wife has never gardened and isn't necessarily looking forward to it, but is looking forward to eating the produce.

We haven't quite decided what we will grow. We have decided that we will start with plants and not from seed, given the late start we are getting. We planted 4 "Sweet 100" grape tomato plants and one "Stripey" heirloom tomato plant which we will attempt to save seed from, if we can remember. We also planted an orange bell pepper plant and four cabbage plants. Next weekend we'll plant some seeds we had left from last year that we never got to use at our condo and see how they do: some kale, eggplant, and basil. If there is any room left, we may try a potato of some kind, and maybe a melon.

I think the really tricky part--even trickier than getting the plants to survive and produce--will be deterring the local wildlife from eating our food before we get to eat it.  We got some netting that is supposed to annoy deer.  I guess we'll see how effective that is.  I'll also look into planting some plants that deer, and other animals in the area don't like and see how well that works.


Our garden patch. I'll report later how effective the deer
netting is. Under the netting are tomatoes, pepper and
cabbage plants.

Friday, May 20, 2011

A New Roof

Our home inspector told us before we bought the house, that we should replace the roof as soon as we can. At the time of the inspection, there was no evidence of any leaks, so he thought we could probably get by with the existing roof for a year or two. Well, the roof didn't last but another seven months before I noticed several leaks. By the time we actually moved in, the sheet rock ceiling had begun to sag in one area and every time it rained, there were puddles in the same spots around the house.

The original roof was corrugated steel, and we wanted to replace it with a more modern-looking steel roof. The original roof was owner-installed, and looked it. We wanted to the new roof to look good and last long, so we asked for quotes from three vendors who were members of the Better Business Bureau and had good customer ratings. Two vendors responded with proposals, one bid was more than twice the bid of the other. The proposals didn't differ much with respect to the actual work done or materials used, so we went with the lower bid, but upgraded the roofing material used. The vendor proposed using a 29-gauge steel and we asked for a 26-gauge steel. The vendor offered Loc-Rib which features concealed fasteners and a very beautiful profile in our opinion, and we figured it might dent less when small branches fall from the trees overhanging the roof. We chose a dark brown color which goes well with our cedar siding.

Given that there were significant leaks in the existing roof, we knew there would be additional work. It turned out to be even worse than any of us, including the roofer, expected. Most of the sheathing over half of the house had to be replaced. Furthermore, the insulation had some mold, so we removed it while the roof and sheathing was off. One rafter was rotted completely through and was replaced, and the two neighboring rafters were reinforced. All this extra work doubled the amount of work to about four days instead of two, but the end product looks very nice! It feels good to not have to cover things up inside the house when there is rain in the forecast.

Now we need to remove the ceiling and the remaining insulation, remove any existing mold, and install new insulation and a new sheet rock ceiling.  I'll probably remove the existing ceiling myself as well as install new insulation. But I'll probably hire someone to install the sheet rock on the cathedral ceilings. I just don't like holding heavy objects over my head in precarious positions.


Before: Leaky and ugly

After: Dry and attractive

Monday, May 16, 2011

Energy Efficient Lighting

The typical incandescent bulb is a better source of heat than it is of light. In a few situations, a low-wattage heater is what is actually desired, but when you're off-grid and needing light, you don't want to be wasting electricity on something you don't want.  Fortunately, these days there are a plethora of lighting options, some of which were not a viable option just five years ago. Our off-grid house had 60W incandescent light bulbs in the four recessed lighting fixtures in the living room.  I'm guessing the previous owner didn't want to pay the higher price for dimmable compact florescent bulbs. Before purchasing dimmable replacement bulbs, I looked at my options.

Incandescent
Not really an option, in my opinion as I'm looking for something more energy efficient.

Halogen
Halogen bulbs use 20% to 30% less electricity for bulbs producing the same amount of light.  Like Incandescent bulbs, halogen bulbs produce full spectrum light, and they are reasonably priced.

Compact Florescent
The standard in energy efficiency, compact florescent bulbs use about one fourth the electricity of incandescent bulbs producing the same amount of light.  While they tend to cost quite a bit more than incandescent bulbs, they last significantly longer and are generally more cost effective in the long run. Some positive aspects of compact florescent bulbs: long-lasting, low power consumption, available in various color temperatures from warm to daylight, and they are available in dimmable models (make sure the packaging mentions the bulb is dimmable, otherwise it is not).  Some negative aspects: compact florescent bulbs contain toxic and hazardous materials (mercury) and must be disposed of properly, many (i.e., most cheaper and/or older) bulbs do not produce full brightness immediately, and dimmable bulbs cost quite a bit more than regular compact florescent bulbs.

LED
LED bulbs strive to be even more efficient than compact florescent bulbs. In reality, I found that the more affordable models (they are much more expensive than compact florescent bulbs) consume about the same amount of electricity as compact florescent bulbs producing the same amount of light. LED bulbs don't contain any toxic or hazardous materials. Until fairly recently, LED lighting tended to be extremely white or too yellow and provided a very unattractive light color for most residential applications, in my opinion. LED lighting manufacturers seem to have figured this problem out, and fortunately many models are dimmable. Generally, LED light bulbs last at least as long as compact florescent bulbs. The major drawback remaining is their price. However, prices are slowly coming down and in a few more years will probably be not much more expensive than compact florescent bulbs.

So what did I get? Since I was looking for efficient bulbs that were dimmable, I went with LED lighting. Because compact florescent bulbs don't produce full brightness immediately, I don't want to have to adjust the brightness again once the bulbs achieve full brightness.  Halogen bulbs didn't give me the increase in efficiency that I was looking for.

How well do they work? They work pretty well with a few caveats. When running off batteries with a modified sine-wave inverter, there are a few problems. The dimming range is significantly reduced. The brightness can be varied only slightly around the bright end.  Dim a little more and the bulbs start blinking. I have a theory as to why this might be, but since I really don't know, I'll just leave it at that. If someone can explain why these bulbs are behaving this way, please make a comment below. I did notice that when the generator is running (which produces a much more conforming sine wave) the dimming works great and I can get the bulbs to go much dimmer before they turn off completely.

The actual bulbs I got were the least expensive LED bulbs I could find at Home Depot that were comparable to a 60 watt incandescent bulb. That particular bulb happened to be an Ecosmart model. It claimed a warm- to bright-white color temperature and that it was dimmable. There was also a model from Philips which cost $5 more per bulb.  I decided to save the $20.

More LED lighting options are becoming available all the time, so try them out!

Incandescent bulbs on the left, LED lights on the right. Notice
the more defined circle of light projected on the floor by the
LED lights. There is a definite cone of light coming from the
LED light vs. the incandescent  bulbs.


Resources
EcoSmart Bulbs from Home Depot: http://www.homedepot.com
Philips Lighting: http://www.lighting.philips.com/us_en/consumer